Contents
Flashing a Demo Image
Prepare your Linux Host PC station, by installing bmap-tools packages (example for Ubuntu Host) :
$ sudo apt-get update -y
$ sudo apt-get install -y bmap-tools
Insert an SD-CARD into the host reader, check with dmesg command mounted device path, and on Linux console type following command (example with /dev/mmcblk0 and linrt-full-multimedia-qt5-image-demo for Mira i.MX6Q SBC)
$ sudo bmaptool copy linrt-full-multimedia-qt5-image-demo-phyboard-mira-imx6-3-demo.wic.gz /dev/mmcblk0/mmcblk0)
Note: the demo images are available on the download page here…
Exploring the LinRT Demo Image
Demo Image limitations
The SD-CARD demo images are configurated as :
- No CAN Bus support
- No Wifi support
- No NOR and NAND Flash support
- Automatic Power-down after 15 minutes (needing switch off / switch on power supply to reboot)
Note: for having the exact packages list included in the LinRT Demo Image, read <IMAGE_NAME>.manifest file downloaded with the <IMAGE_NAME>.wic.gz file.
Running Demo Image
Connect your Single Board Computer on your Host PC with an RS232 serial cable or mini USB cable (depending on Board), and configure your serial terminal client for 115200 baud, 8 data bits, no parity, and 1 stop bit (8n1).
Using Minicom
You can use minicom as a serial COM Terminal on your Linux host. For installing minicom, the follow the command :
$ sudo apt-get install -y minicom
To need setup minicom, by following next instructions:
$ sudo minicom -s
Enter to the Serial port setup menu and configure the serial port with 115200 baud, 8 data bits, no parity, and 1 stop bit (8n1) default settings.
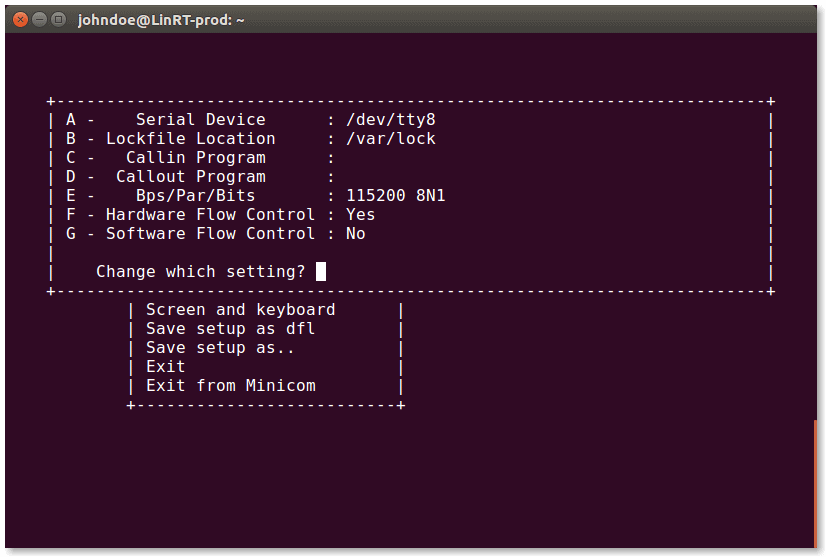
If you are using USB serial converter or mini USB modem, you can set the serial device /dev/ttyUSB0 for example. Validate by pressing Enter key and select the Modem and dialing menu.
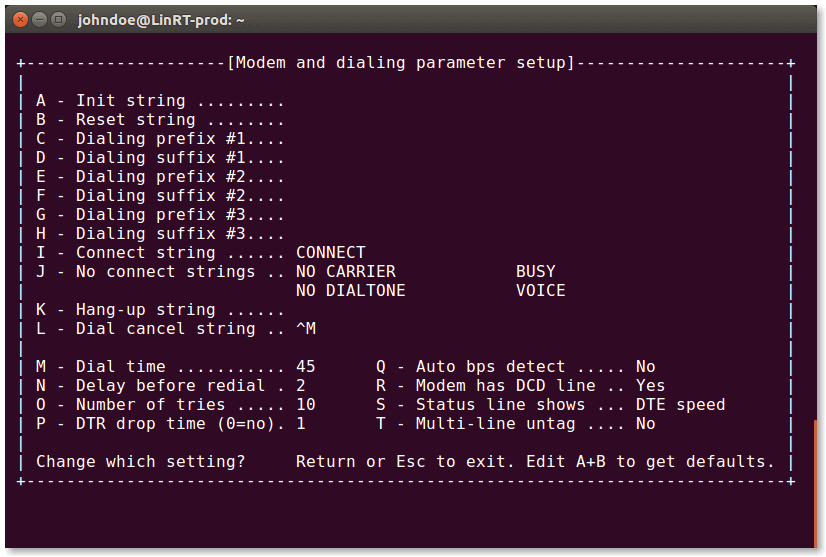
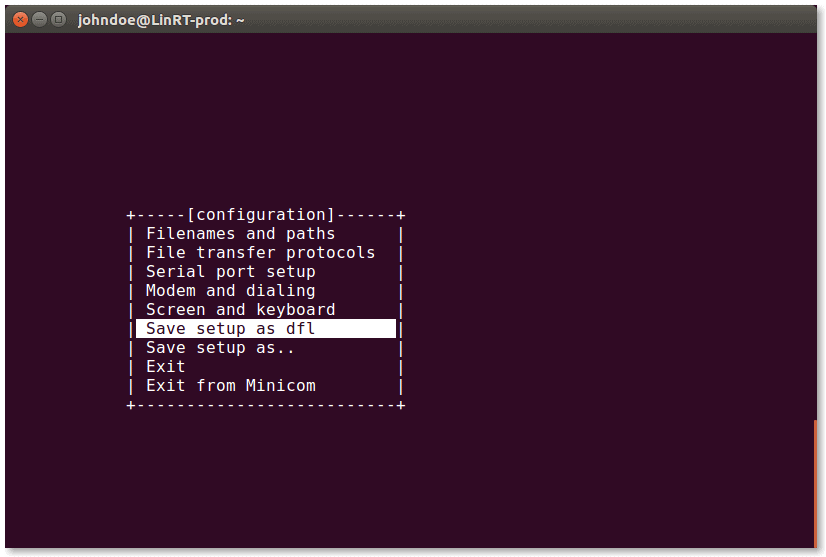
Please clear A/B/C/D/E/FG/H and K settings and validate by pressing Enter key, and save the setup as default.
Note: These setting are defined for each minicom startup but you should select another serial device at usage, by using the following command to set the current serial device with -D minicom command option as follow :
$ sudo minicom -D /dev/ttyUSB0
Settings the Primary display
For the first boot, connect the HDMI display as primary, and USB mouse for GUI demo.
- Framebuffer /dev/fb0 : HDMI Full HD (primary display)
- Framebuffer /dev/fb2 : 10” LVDS 800×640 display with Resistive Touch (G104SN02)
- Framebuffer /dev/fb4 : 7” LCD 800×480 display with Capacitive Touch (AC104)
At startup, the splash tool and demo app are displayed on the primary screen define by fbcon argument passing to the kernel command line. The primary display can be changed by editing Barebox bootloader environment linux.bootargs.fb.

Reboot the system and stop it by pressing a key when the Barebox’s prompt wait to the message “Hit any key to stop..” on the serial console.
To edit and modify linux.bootargs.fb arguments, follow the command :
$ edit